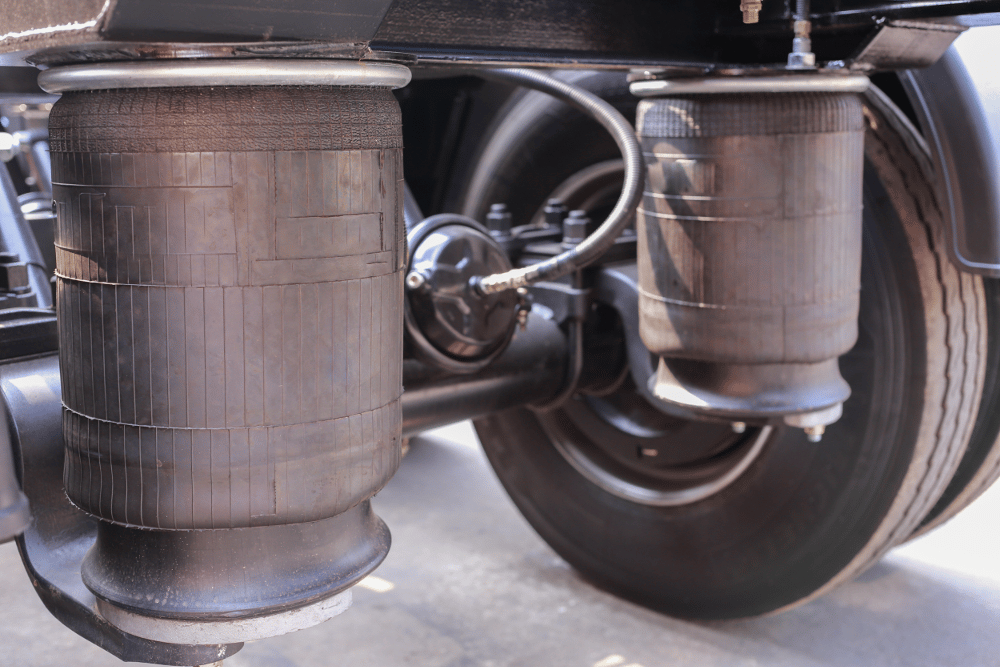
Air suspension systems in tractor trailers play a critical role in ensuring a smooth and comfortable ride, while also protecting the cargo from damage. One key component of the air suspension system is the air bag or air spring, which is responsible for cushioning the truck against road shocks. These air bags serve many purposes such as properly balancing your loads, provide a measurable pressure reading that can be used to calculate your axle load weight and providing a smooth ride.
Over time, these air bags may wear out and you will need a replacement. Your air suspension should be a primary fixture that is inspected during a drivers pre-trip inspection or DVIR.
In this blog post, we will guide you through the process of changing an air bag on a tractor trailer's air suspension system. We'll discuss the necessary tools, safety precautions, and step-by-step instructions to ensure a successful replacement.
Tools You Will Need to change an air bag:
- Safety gear: Protective eyewear, gloves, and steel-toed boots
- Jack stands
- Floor jack
- Wheel chocks
- Torque wrench
- Socket set and ratchet
- Wrench set
- Pliers
- New air bag/air spring
- Soapy water in a spray bottle
- Air line release tool (if applicable)
- Zip ties (optional)

Steps to Change an Air Bag on an Air Suspension
-
Safety First: Begin by putting on your safety gear, including protective eyewear, gloves, and steel-toed boots. This will protect you from any debris or potential hazards while working on the air suspension system.
-
Park and Secure the Tractor Trailer: Park the tractor trailer on a level surface and engage the parking brake. Place wheel chocks in front of and behind the wheels to prevent any accidental movement.
-
Release Air Pressure: Before working on the air suspension, it is crucial to release the air pressure from the system. Locate the air tank drain valve and open it to release the air. You can also activate the air suspension height control valve if your tractor trailer is equipped with one.
-
Raise the Vehicle: Use a floor jack to lift the vehicle off the ground, placing jack stands under the frame to support it. Ensure the vehicle is stable and secure before proceeding.
-
Remove the Old Air Bag: Locate the air bag you need to replace. Disconnect the air line from the air bag by pressing the release button or using an air line release tool if required. Use a wrench and ratchet to remove the mounting bolts or fasteners that secure the air bag to the frame and axle. Carefully remove the old air bag from the suspension.
-
Inspect and Clean: Before installing the new air bag, inspect the mounting hardware and brackets for any signs of damage or corrosion. Clean the mounting surfaces with a wire brush, and replace any damaged hardware.
-
Install the New Air Bag: Align the new air bag with the mounting brackets, ensuring the air inlet is facing the correct direction. Fasten the air bag to the frame and axle using the mounting bolts or fasteners, and tighten them to the manufacturer's recommended torque specifications using a torque wrench.
-
Reconnect the Air Line: Reattach the air line to the new air bag, ensuring a secure connection. You may want to use zip ties to keep the air line in place and prevent it from rubbing against other components.
-
Inflate the Air Suspension: Close the air tank drain valve and start the vehicle to build air pressure in the system. Allow the air suspension to inflate until it reaches its normal ride height.
-
Inspect for Leaks: With the air suspension inflated, use a spray bottle filled with soapy water to check for any air leaks around the new air bag and air line connections. If you notice any bubbles, tighten the connections or replace any damaged components.
-
Lower the Vehicle: Once you have confirmed there are no leaks, carefully remove the jack stands and lower the vehicle using the floor jack. Double-check that all connections and fasteners are properly tightened and secure.
- Test Drive: To ensure the successful installation of the new air bag, take the tractor trailer for a short test drive. Pay attention to the ride quality and any abnormal noises that might indicate an issue with the air suspension. If you notice any issues, reinspect the air bag installation and address any problems before continuing to use the vehicle.
Changing an air bag on an air suspension for a tractor trailer may seem like a daunting task, but with the right tools, safety precautions, and proper technique, you can successfully complete the job. By following these steps you will be able to replace a worn-out air bag and maintain the performance and safety of your tractor trailer's air suspension system. Incorporate these steps into an in-house preventative maintenance procedure to reduce outsourced maintenance cost and unnecessary equipment downtime.
Regular inspection and maintenance of your air suspension components can help extend their lifespan and ensure a smooth and comfortable ride for both you and your cargo.